When you use your universal pay link , your customers can pay with flexible terms, but you receive the money in your bank immediately.
You can even use optional query parameters to pre-define amounts or references for your convenience.
Before You Begin
These notes will help the process go smoothly.
The faster and simplest way to integrate iwocaPay and offer your customers flexible terms while you get paid up front.
It should take less than an hour to set up
And you won’t need any coding skills or technical expertise.
Choose your pricing structure Feature pay link solution API solution Redirect Buyer back to Seller website Only show Pay Later or Pay Now in checkout Automatically reconcile payments Define amount and reference for every order Control pricing using universal pay link settings Low-code solution
After your customer clicks the pay link or button, they’ll be directed to the checkout page in a new window.
What happens next depends on how they choose to pay:
Pay Now : The customer chooses their bank account and pays in a few clicks.Pay Later : The customer applies to spread out the cost with iwocaPay by providing some details (if they don’t already have an account with us).
After they’re approved, they proceed to checkout.
After checking out, they’ll see a confirmation screen.
Pay Later users receive an automatic confirmation email.Pay Now users receive a confirmation email after completing checkout.
Add iwocaPay to your ecommerce platform with a payment button.
The payment button links your customers to the universal pay link checkout page.
You control the button’s design to match your website.
Above: An example website with a pay link button.
Link your payment button to your universal pay link , which can be found in your iwocaPay dashboard .
The link follows this format:
https://www.iwoca.co.uk/pay/me/supplier_handle/
You can pre-fill the checkout page with a payment amount and a unique order reference by adding these query parameters:
Query Parameter Description amount Total order amount reference Order identifier for tracking
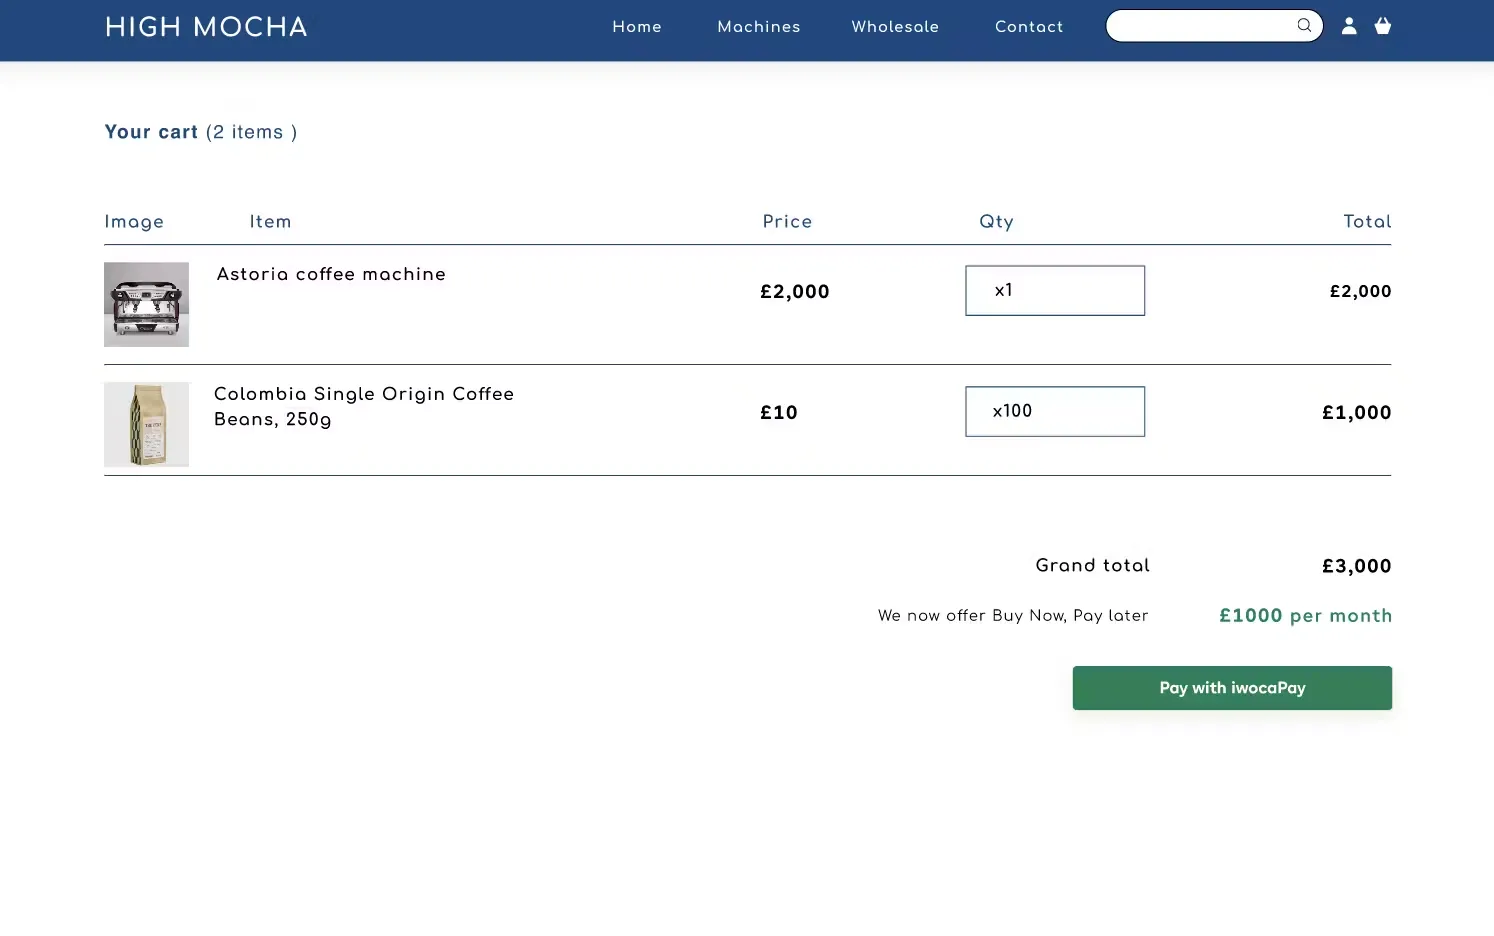
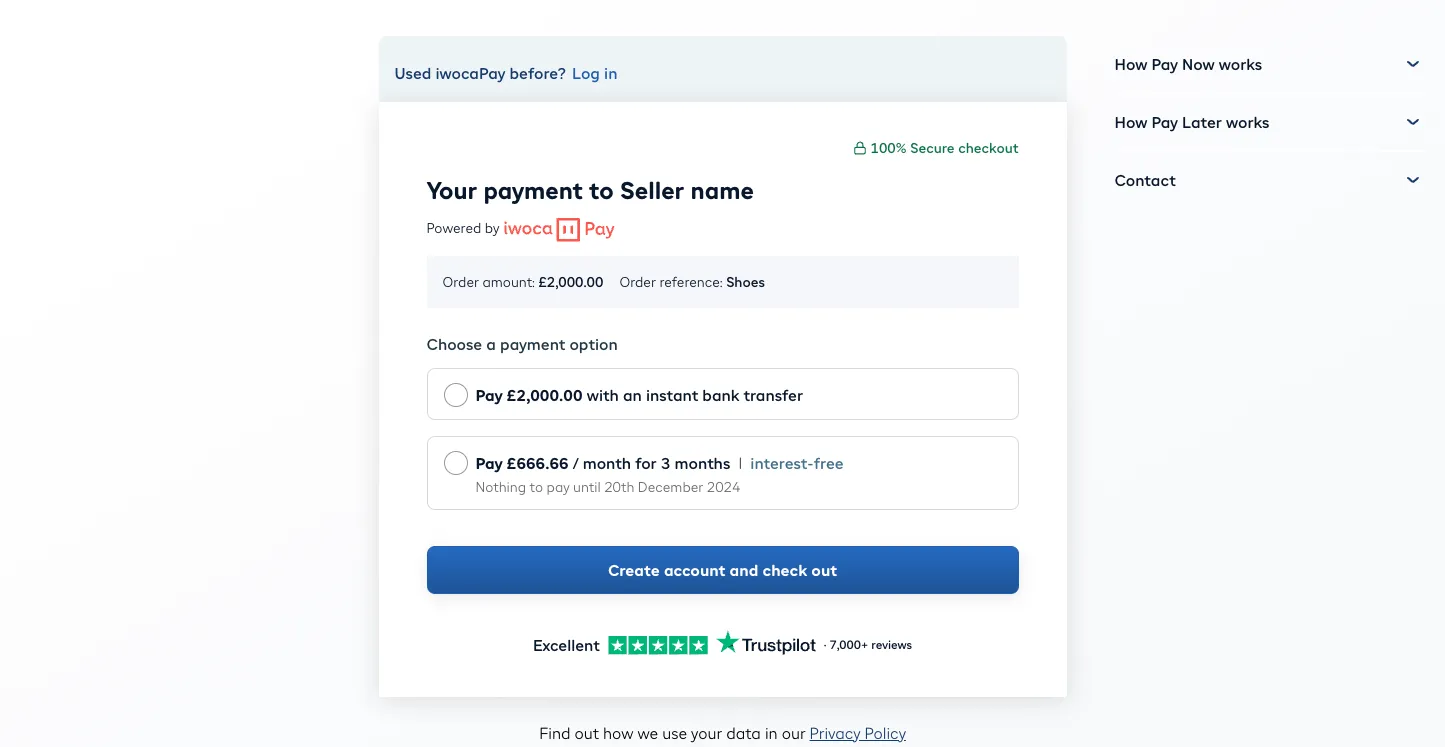
https://www.iwoca.co.uk/pay/me/supplier_handle/?amount=2000&reference=test1234
Above: Example checkout screen with amount and reference defined.
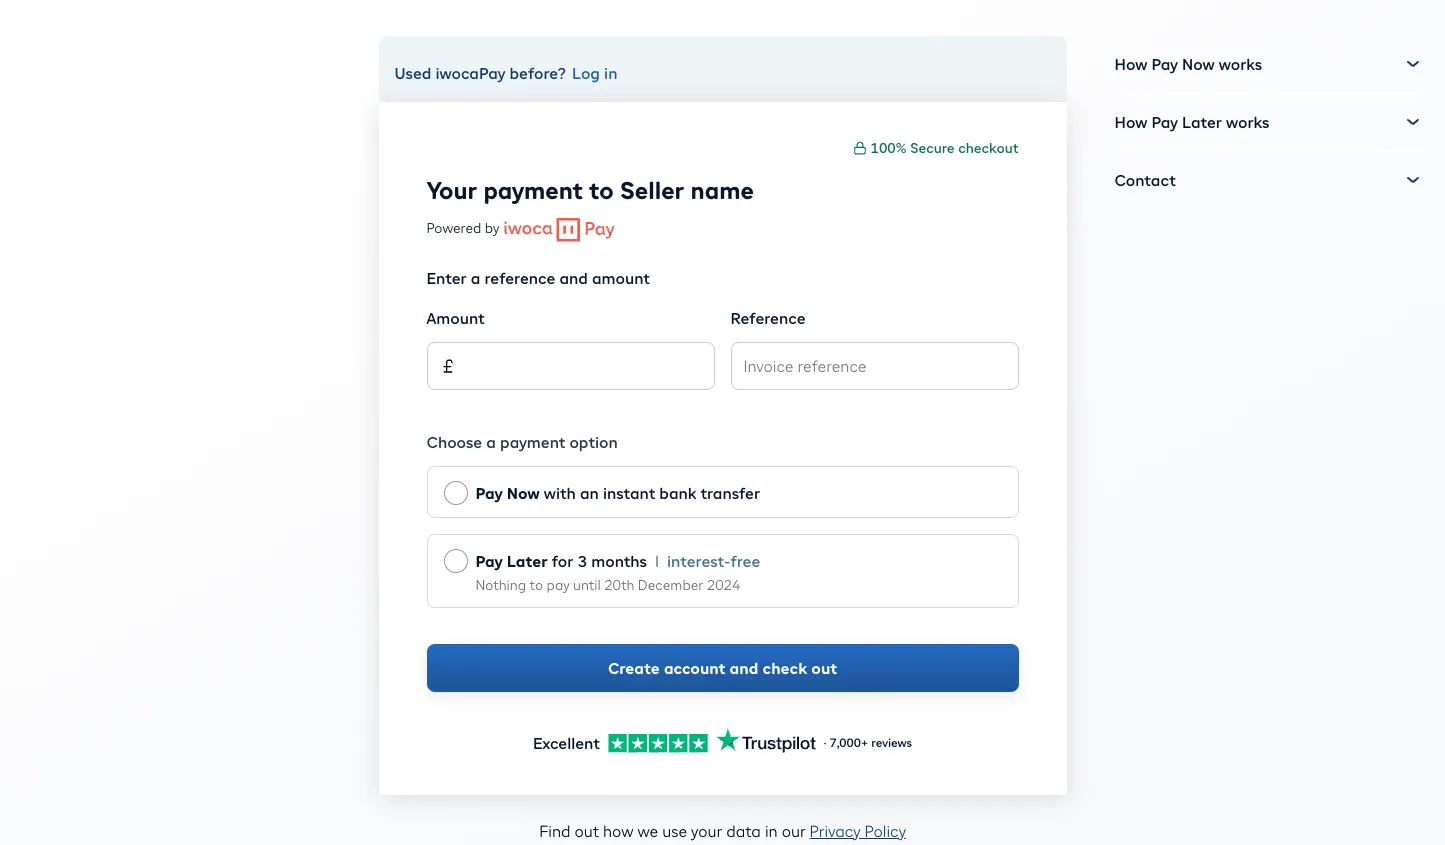
If you prefer, you can use the universal pay link without any parameters. Your customers will enter the amount and reference on the checkout page.
Above: Example checkout screen without amount and reference defined.
Your customer chooses to Pay Now or Pay Later.
Either way, funds are sent instantly to your account.
The fees for Pay Later will reflect the pricing configuration of your universal pay link .
Read more about pricing options in Pricing structure .
After funds are received, you’ll get a confirmation email.
The payment appears your seller dashboard.
Both the email and dashboard will show the payment amount and reference.
You’ll need to reconcile transactions manually, similar to reconciling inbound BACs or FPS payments.
Here are some methods to do this:
Check the You’ve been paid email from iwocaPay, which includes the amount and reference.
Review your bank account for a payment from iwocaPay. Funds are transferred instantly, regardless of the payment method chosen by the customer.
Check the Payments tab in your iwocaPay dashboard .
For more information on pay links and payment tracking, refer to our welcome pack .
Contact us via your account manager, and we’ll be happy to assist you.